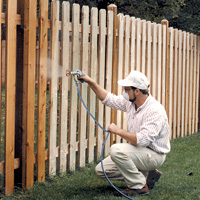
How to use an airless paint sprayer
 Surface Preparation
Before starting any painting project, clean the surface to be painted as thoroughly as possible. Allow surface to dry completely before painting. (For details see Surface Preparation)
Safety Notice: Whenever operating equipment it is important to take proper safety precautions, be mindful of potential hazards, wear protective clothing and eyewear, and stay alert. Always refer to the specific instructions and safety procedures for the spray equipment you are using.
- Clear - Move as much of the furniture out of the room as possible. Any furniture left in the room should be moved to the center and completely covered. Make sure to have plenty of space for your tools and equipment.
- Cover - Cover everything you don't wish to get paint on. Mask and paper around trim, doors and windows.
- Remove - Loosen or remove cover plates from light fixtures. Turn off the electricity to the room and remove cover plates for electrical fixtures, outlets and switches. Remove heating and air conditioning vent covers.
- Repair - Fill in all nail and screw holes with spackling compound using a putty knife.
- Clean - Wash the entire area that is to be painted. Allow surface time to dry thoroughly.
- Safety - When painting indoors, make sure that there is adequate ventilation. Wear protective clothing. This may include: gloves, eyewear, clothing, spray sock (hood), hats, footwear, dust masks and respirators. If you're painting in the vicinity of any appliances turn them off.
Painting
- Before you start spraying, be sure that all surfaces are properly prepped. Any surfaces you do not want painted should be covered or blocked using a spray shield. If you are in a smaller area or don't want to spray, use an ASM Pressure Roller Attachment for great results and time savings.
- Select the spray tip that best meets your needs for the material (paint) you are spraying and the surface to be sprayed. Be sure the orifice size selected does not exceed the maximum capacity of your sprayer. (See tip selector.)
- Typically, when painting, it is best to start at the top and work your way down. Work in sections, only as far as you can comfortably reach. First spray the outer edges, "banding" the area that you will spray and cutting in any corners. For inside corners, aim the spray tip directly into the corner so it overlaps both sides. Next, point the spray tip at the edge of the previous painted area to overlap by approximately 50%.
- Cut in around windows and doors first, and then spray paint the remaining flat areas using overlapping strokes.
Clean Up
- Allow significant time for the paint to dry before removing tape from your trim. This will result in crisp, clean lines.
- Remove all coverings from furniture and other areas.
- Replace any lighting fixtures, cover plates and vent covers that may have been removed.
- Clean your airless paint sprayer after each use. Follow the directions in your user's manual for Power Flush cleaning with water based materials or use the bucket method of cleaning for solvent based products.
- Move furniture or other items back into place.